Showing posts with label sewing. Show all posts

Thursday, June 16, 2011

Learn from my mistakes - 2

If you're anything like me, you obsess every new sewing project. You want to jump right in and get it done as fast as possible. But when you do it fast you tend to cut corners and do a sloppy job. Then you're disappointed in the end. There's a couple things you can do to ensure a well sewn project every time.

1. Iron, iron, iron. I used to skip ironing when I was younger and I can't even understand why now. It may take time and effort to do it right, but it makes the sewing so much easier and it looks 100 times better!

2. If you're using a pattern, make sure you cut out the triangles and mark important circles/squares/center lines/etc. I admit I still cut corners and I don't mark every single line, but I still mark the important things with a fabric marker with disappearing ink. I tried to skip this with a project just last week and screwed up. You'd think I would have learned by now :P

3. If you're not using a pattern, measure twice, cut once. Actually measure 3 or 4 times (or more) and make sure your estimations are right. I don't know how many times I've jumped into cutting, only to have my project be an inch short or too tight. A big mistake I remember making was this mermaid tail for Elise's first Halloween:

Photobucket

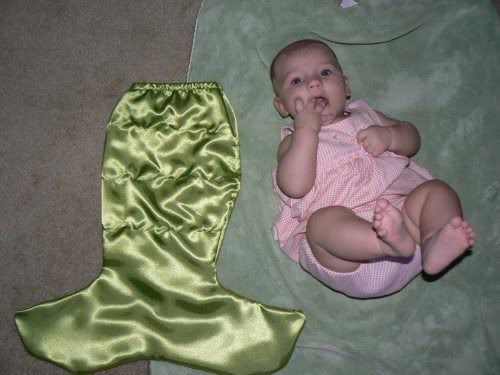
I could barely fit it over her legs! I had to start all over again. And because it was too small, I couldn't reuse the fabric. What a waste!

Photobucket

Here's the finished product :) Nice a roomy and warm for a little munchkin!

Take the time to do your project right and you won't be disappointed. No one ever looks back at a project and thinks "I wish I wouldn't have done such a good job" ;)

Learn from my mistakes - 1

I want to add a little more content to my blog, so I'm going to start writing about mistakes I've made or simple ways to help better your sewing/crafting skills. First up is the biggest mistake I've made, because I think about it every time I sew. If you have cats, or any animals really, LOCK UP YOUR THREAD. Anything long and stringy, thread, yarn, elastic, ANYTHING. Put it in a box with a tight lid and put it out of reach. Put all trimmed threads into a garbage can with a lid or tuck them way down into the garbage. Never leave your machine unattended with the needle threaded, and tuck bobbin thread under a lowered presser foot.

About 5 years ago my cat, Logan, somehow got into my thread stash that I thought was out of reach. I'm still not even sure how he did it, but he managed to find and swallow a piece of thread about 6-8 inches long. I had no clue until the following day, when he started throwing up. We assumed he had a hairball, but by the evening he wasn't looking so good. I took him to the vet first thing in the morning where he immediately found the thread still sticking out under his tongue. I had checked his mouth, but not under his tongue! He needed emergency surgery right away, and $500 later he was on his way back to normal.

Photobucket

I am crazy about thread lock up now. I relaxed a bit sometime last year, and started leaving my thread on the machine again. I walked downstairs one day and discovered thread trailed halfway across the basement. Luckily none of the kitties swallowed any. I'll never make that mistake again!

Thursday, April 28, 2011

Almost finished with the Rapunzel dress :)


I just couldn't wait to finish it before I posted. I'm so excited, it's turning out so cute! I just need to sew the velcro closures on and sew the skirt to the bodice, then I'm done. Too bad I have to wait until June to give it to Elise. She's seen me making it, so it's not a surprise...but she still can't have it until her birthday :P

Sunday, April 10, 2011

Barbie couch!

I made this Barbie couch for my 3 year old a couple months ago, but finally took a picture of it. It was a giant pain in the butt! I was going to do a tutorial for it, but I think it would have left people screaming at their computers and cursing me lol

Photobucket

It sure turned out cute though!

Photobucket

This is what happens when I try to take a pic with a doll on the couch haha

I made a little felt pizza tutorial that I'll try to get up tomorrow! I've seen some around the web, but it was easier to just use what I saw to do it my own way. Here's how the pizza turned out:

Photobucket

My 3 year old made the green pepper faces :D

Tuesday, April 5, 2011

Birthday planning!

My big girl is going to be 4 this June, I can't believe it! I know it's kind of early to be planning for her birthday, but I can't help it XD I'll probably be planning the baby's 2nd birthday party right after Elise's is over lol. She requested a mermaid party and is VERY excited about it. So far I've made a pennant banner that says "Happy 4th Birthday", which was probably the biggest decoration. I'll be making some big tissue poms closer to the party, and some seahorse shaped white (light green actually) chocolate covered pretzels! I'm making blue frosted cupcakes with sea foam colored sugar sprinkles, plus white chocolate seashells on top! I'll probably make some cupcake toppers for some of them, too. The games and favors are a secret for now ;)

I've also been thinking about what to get my big girl. We were going to get a big girl bike, which she had been asking for. But she recently changed her mind, insisting her little pink balance bike was just fine! She's suggested a few things to us, but she really isn't pining over anything special. She does love Disney's Tangled and all things Rapunzel, so I think I might try making a Rapunzel costume. Bonus points that we can use it for Halloween! I've been looking at patterns and decided McCall's M5954 would be perfect:


The pattern includes an alternate version without the poofy things at the waist, so with just a few changes it can look pretty darn close to this:


McCall's patterns are on sale $.99 each at Joann this week or next I believe. Costume satins and sheers are going to be 50% off the week before Easter I believe (they should be $2-2.50 per yard). Hopefully that can keep the whole project under $20! Joann also advertised some sundress panels with Rapunzel fabric, and I have a ton of 50% off coupons, so I think I'll make her a sundress for her birthday too :) Sundress should be easy, costume definitely won't be. I HATE patterns. HATE THEM! They might as well write the instructions in russian :P

I have a ton of crafts I need to post, but we've been having sleep issues and all sorts of other toddler issues. By the end of the day I just want to relax and watch TV, not upload pics. Hopefully this will pass SOON, and I can get better about posting again!

Friday, November 12, 2010

1st Birthday Party!

My little Stinkerbell is turning 1 in less than a month! I can't believe how fast it's gone by. I've been pretty sad about her impending 1st birthday since she turned 6 months, but I'm finally coming around. She'll be walking soon, so we can go outside more without worrying as much about the things she'll put in her mouth or the mud puddles she'll crawl through. She'll have all her 1st year molars and canines soon, which hopefully means less cranky baby and more sleep! Maybe she'll even lose her obsession with the toilet soon lol. But best of all, I get to plan a super cute 1st birthday party :D


I only had to make 7 invitations, so I decided on handmade ones! Since Sam loves kitties, I figured a kitty themed party was perfect for her. I had a teeny tiny cardstock kitty in my stash, so I hand drew a bigger version for her cards and crown! I should have glued the polka dot paper on a piece of cardstock before tracing and cutting the kitties so you couldn't see the ribbon through the paper, but oh well. I still think they're adorable! I also splurged on a giant hole punch for the circle behind the number 1. I'm planning on making cupcake toppers for the party with it, too.

There's lots of birthday crown tutorials out there, but this one is by far my favorite! I used it to make a mermaid crown for Elise, and now Sam's birthday crown :D I LOVE how it turned out. It's just a little different shade of hot pink than her shirt, but it's not real noticeable.

The birthday shirt! It turned out way better than I imagined, I'm so happy. I had a lot of different ideas for the applique, but I'm glad I went with a cupcake. Cute and easy!

The best part? My little birthday girl loves her crown! Now I just have to get started on the few other things for the party. I have to make a tutu (or maybe just a matching skirt, haven't made up my mind yet), a matching reconstructed t-shirt dress for big Sis, the cupcake toppers, a matching bib, and possibly a birthday banner. I wasn't planning on going overboard, but I think I may have already passed that point lol!

Wednesday, October 13, 2010

The joys of potty training

I haven't posted in awhile because I've been busy potty training. Oh what fun it's been! We're on day 3 with no successful pees, and I'm getting a bit discouraged. But I did make 6 pairs of cloth trainers that I LOVE. Flannel inside, pul outside, a pocket for stuffing. I can put a prefold in them for moderate absorbency, or a microfiber towel for super absorbency! At home we don't stuff them with anything, so she gets soaked as if she was wearing underwear...but we don't have to deal with puddles everywhere, yay! Hopefully I have time soon to post pics, because I really like how they turned out. The only thing I would change is not using velcro for the sides (I have 3 with and 3 without), and maybe adding another half inch or so to the legs. If I make some more I'll adjust the pattern.

Sunday, September 19, 2010

Ruffle butt leggings!

Inspired by Ruffle Butt brand's new line of super cute leggings, I decided to make my own out of an old pair of leggings + some white tulle I had laying around.

Photobucket

LOOK HOW CUTE THAT IS! They're really easy to make too. I had white tulle off a bolt, so I cut 6 strips about 1.5"wide by however wide the fabric was (I'm pretty sure it was 40", like most fabrics). Then I cut those strips in half so I had 12 strips about 1.5" wide by 20". I layered 4 of the strips together and gathered them like a regular ruffle. Then I pinned them on an old pair of leggings (about 1" from the bottom of the elastic waist, and about 1" apart) and sewed them down with a zig zag stitch. I think they probably took me a total of 30 minutes to make, minus eating dinner and changing the baby. I'd really like to make a couple different colors, maybe some for gifts...because more babies NEED ruffle butts!

Monday, September 13, 2010

Super hero cape!

I finished my first project for this blog, a cape for my little super hero :) She had to try it out right away by playing in the rain lol

I only had to buy the yellow fabric, the rest of the supplies I had laying around the house. $2.50 is a pretty good bargain for hours of imagination!

If you try to make one, I have one tip: When using the zig zag stitch to attach the circle applique to the back, make sure to do it through BOTH layers of fabric or else it bunches up like mine did. Now I know for next time!
Related Posts Plugin for WordPress, Blogger...