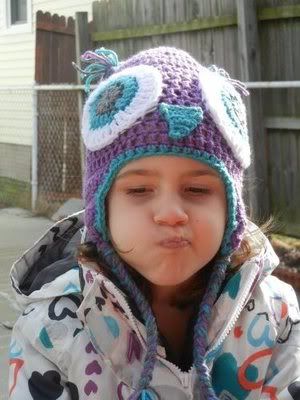
My first big crochet project! Wish I had a link to the pattern(s) I used, but I kinda threw my favorite parts of quite a few patterns together and I can't remember all of them! It turned out really cute, I just wish I would have added a few more stitches around the hat. It fits her but it likes to slowly slide up and off her head, which I guess means it doesn't fit her very well haha. That just means I get to crochet her something new, right?
Tuesday, April 17, 2012
Friday, December 2, 2011
Crochet Bitty Baby hat and booties
I've started to crochet, and I LOVE it! I wasn't very fond of knitting when I tried it, but crochet is great. It's fairly easy to learn thanks to all these great internet tutorials floating around. I can't believe how fast it is too. I made this hat and booties for my daughter's Bitty Baby from a preemie pattern. I think the hat took 2 days, but it was the first thing I ever crocheted! The booties took about 4 days because the pattern had to be altered to fit better and I didn't have a clue what I was doing lol
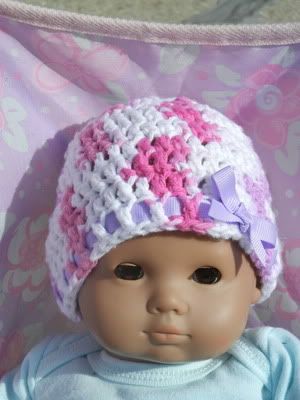
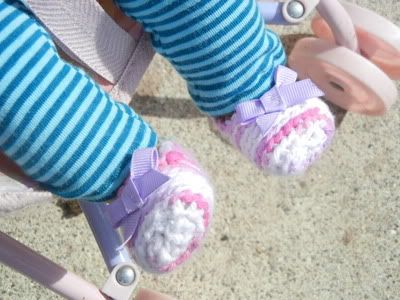
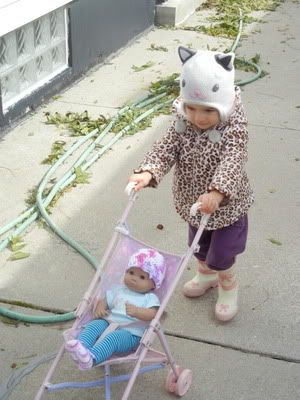
If you're interested, the pattern I used is here. I used Sugar and Cream yarn that I had leftover from a previous knitting fail (I can't recommend this yarn for beginners, it doesn't slide over the needles like acrylics). I followed the hat pattern exactly, but I don't know how accurate I was! The booties were started with the matching bootie pattern at the bottom of that page, but I realized they were too small once I finished the first bootie. Once I realized how they were made I just added extra stitches and tested it out periodically to make sure it might fit. I basically flew by the seat of my pants and somehow they came out okay haha. Not bad for my first crochet projects, huh?
Now I just need to get up a tutorial and pattern for the shirt and pants. The top was made from a newborn onesie I bought at my neighbor's garage sale for $.25, and the pants were made from an old pajama top of mine. There's a hat that matches the pants as well, but I'll save that for next time ;)
Friday, September 30, 2011
Personalized hooded towels!
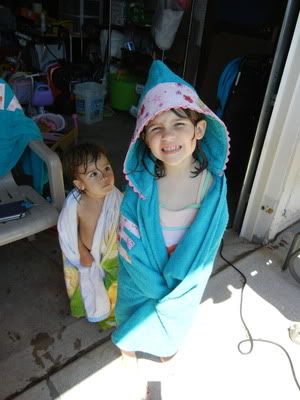
My little cousin Sophia turned 5 this past August, so I wanted to make her something special. She's a little fish, always swimming! So I decided to try my hand at this awesome hooded towel tutorial. I made my older daughter one too, since 1 hand towel makes 2 hoods and I didn't want to waste a half a hood! The names on the back were done by first printing out the letters I needed using Paint Shop Pro. Then I used a little double sided fusible interfacing to iron them on, and did some free hand embroidery on my plain old sewing machine. It wasn't perfect, but it was close enough :P It's really isn't as hard as it looks. Just set your machine to a wide zig zag stitch with a length of almost zero. Play around with your machine and a scrap piece of fabric until you get it how you want it. Corners are tricky, but the key is to go slow and maneuver your towel/fabric like you were going around a curve. Another tip: If your fabric is light and the towel is dark like mine was, use some white fabric or muslin under your letter so you can't see the towel through it. Just make a double wonder under sandwich so everything sticks together.

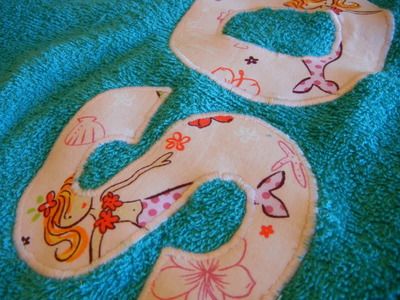
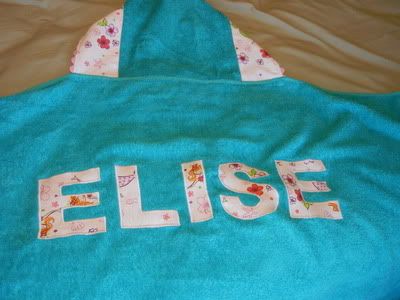
I didn't get any pics of Sophia in her towel, but rest assured she loves it. She uses it every time we go swimming together :)
Friday, September 16, 2011
T-rex in a tutu!

1) print out a clip art of a t-rex and adjust the size to fit the t-shirt
2) iron some double sided wonder under to my fabric about the size of the t-rex
3) cut out the dinosaur
4) put some fray check all around the edge of the t-rex (since I couldn't do a zig zag stitch on such small details)
5) iron it onto the t-shirt
6) sew around the edge of the t-rex
7) gather a strip of tulle on the machine and
8) hand sew it on!
Thursday, June 16, 2011
Learn from my mistakes - 2
If you're anything like me, you obsess every new sewing project. You want to jump right in and get it done as fast as possible. But when you do it fast you tend to cut corners and do a sloppy job. Then you're disappointed in the end. There's a couple things you can do to ensure a well sewn project every time.
1. Iron, iron, iron. I used to skip ironing when I was younger and I can't even understand why now. It may take time and effort to do it right, but it makes the sewing so much easier and it looks 100 times better!
2. If you're using a pattern, make sure you cut out the triangles and mark important circles/squares/center lines/etc. I admit I still cut corners and I don't mark every single line, but I still mark the important things with a fabric marker with disappearing ink. I tried to skip this with a project just last week and screwed up. You'd think I would have learned by now :P
3. If you're not using a pattern, measure twice, cut once. Actually measure 3 or 4 times (or more) and make sure your estimations are right. I don't know how many times I've jumped into cutting, only to have my project be an inch short or too tight. A big mistake I remember making was this mermaid tail for Elise's first Halloween:
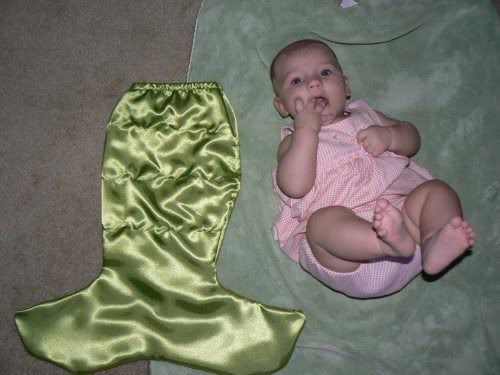
I could barely fit it over her legs! I had to start all over again. And because it was too small, I couldn't reuse the fabric. What a waste!

Here's the finished product :) Nice a roomy and warm for a little munchkin!
Take the time to do your project right and you won't be disappointed. No one ever looks back at a project and thinks "I wish I wouldn't have done such a good job" ;)
1. Iron, iron, iron. I used to skip ironing when I was younger and I can't even understand why now. It may take time and effort to do it right, but it makes the sewing so much easier and it looks 100 times better!
2. If you're using a pattern, make sure you cut out the triangles and mark important circles/squares/center lines/etc. I admit I still cut corners and I don't mark every single line, but I still mark the important things with a fabric marker with disappearing ink. I tried to skip this with a project just last week and screwed up. You'd think I would have learned by now :P
3. If you're not using a pattern, measure twice, cut once. Actually measure 3 or 4 times (or more) and make sure your estimations are right. I don't know how many times I've jumped into cutting, only to have my project be an inch short or too tight. A big mistake I remember making was this mermaid tail for Elise's first Halloween:

I could barely fit it over her legs! I had to start all over again. And because it was too small, I couldn't reuse the fabric. What a waste!

Here's the finished product :) Nice a roomy and warm for a little munchkin!
Take the time to do your project right and you won't be disappointed. No one ever looks back at a project and thinks "I wish I wouldn't have done such a good job" ;)
Learn from my mistakes - 1
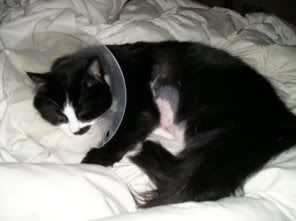
I want to add a little more content to my blog, so I'm going to start writing about mistakes I've made or simple ways to help better your sewing/crafting skills. First up is the biggest mistake I've made, because I think about it every time I sew. If you have cats, or any animals really, LOCK UP YOUR THREAD. Anything long and stringy, thread, yarn, elastic, ANYTHING. Put it in a box with a tight lid and put it out of reach. Put all trimmed threads into a garbage can with a lid or tuck them way down into the garbage. Never leave your machine unattended with the needle threaded, and tuck bobbin thread under a lowered presser foot.
About 5 years ago my cat, Logan, somehow got into my thread stash that I thought was out of reach. I'm still not even sure how he did it, but he managed to find and swallow a piece of thread about 6-8 inches long. I had no clue until the following day, when he started throwing up. We assumed he had a hairball, but by the evening he wasn't looking so good. I took him to the vet first thing in the morning where he immediately found the thread still sticking out under his tongue. I had checked his mouth, but not under his tongue! He needed emergency surgery right away, and $500 later he was on his way back to normal.
I am crazy about thread lock up now. I relaxed a bit sometime last year, and started leaving my thread on the machine again. I walked downstairs one day and discovered thread trailed halfway across the basement. Luckily none of the kitties swallowed any. I'll never make that mistake again!
Thursday, April 28, 2011
Almost finished with the Rapunzel dress :)

I just couldn't wait to finish it before I posted. I'm so excited, it's turning out so cute! I just need to sew the velcro closures on and sew the skirt to the bodice, then I'm done. Too bad I have to wait until June to give it to Elise. She's seen me making it, so it's not a surprise...but she still can't have it until her birthday :P
Subscribe to:
Posts (Atom)

